Must-Have Tools for DIY Washer Repair
Tools You Need to Fix Your Washing Machine at Home
Fixing your washing machine might sound overwhelming, but it’s easier. With the right tools and patience, you can solve common problems like leaks, clogs, or a washer that refuses to spin. If you have a smart washer, the process might be a little different, but the basic steps still apply. Doing it yourself saves money and gives you the satisfaction of learning something new. All you need is a basic set of tools and a little knowledge about using them. This guide will show you exactly what tools you need and how to get started with washer repairs.
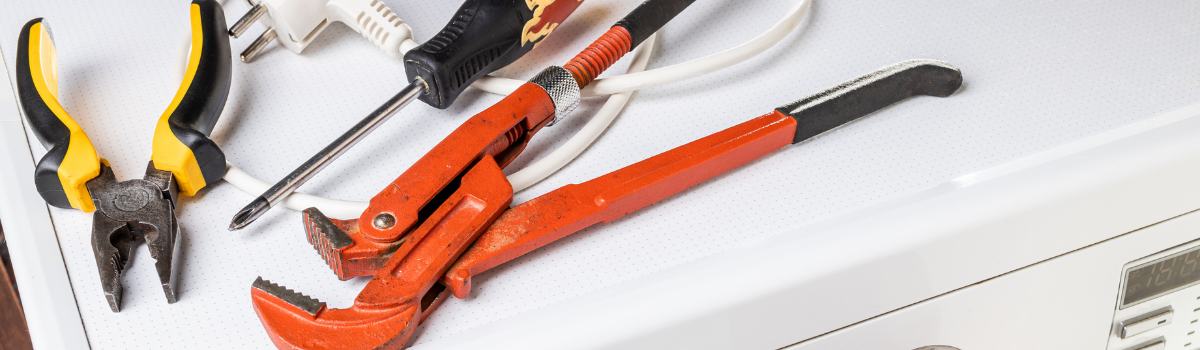
Essential Tools for Fixing a Washing Machine
To fix a washing machine, you need the right tools. Using the right tool for the job makes everything safer, easier, and faster. Here are the tools you’ll need, grouped by their purpose.
Tools for Opening the Washer
Before you can fix anything inside the washer, you need to safely take it apart. These tools help you remove panels, screws, and other parts without damaging anything:
- Screwdriver Set: Washing machines usually have Phillips screws (crosshead) or flathead screws. A set with both types will cover almost every job. Pro tip: Use a magnetic screwdriver so screws don’t fall inside the machine.
- Putty Knife: Modern washers often have panels held in place by clips or glue. A putty knife can slide under the panel to gently pop it open without scratching or breaking it.
- Socket and Wrench Set: Bolts hold many parts inside a washer, like a drum or motor, in place. A socket set helps loosen and tighten bolts quickly. An adjustable wrench is a great tool for working with different-sized bolts.
Tools for Diagnosing Problems
After opening the washer, you need tools to determine what’s wrong. These tools help you check parts and find the source of the issue:
- Multimeter: A multimeter tests whether electrical parts like the motor, lid switch, or control board are working. It measures voltage, resistance, and continuity (if electricity can flow through a part). For example, if your washer isn’t spinning, you can test the lid switch to see if it’s broken.
- How to use it: Set the multimeter to “continuity,” place the probes on the lid switch terminals, and see if the circuit is complete. If there’s no connection, the switch needs to be replaced.
- Flashlight: Washers have dark, hard-to-reach areas, like under the drum or behind the machine. A bright flashlight makes seeing what you’re working on much easier. A headlamp works even better because it lets you use both hands.
Tools for Repairs and Handling Parts
Once you know what’s wrong, you’ll need tools to replace or adjust parts. These tools help you handle small parts, wires, and clamps without frustration:
- Needle-nose Pliers are great for gripping small parts, pulling wires, and working in tight spaces. If a hose is stuck, you can use needle-nose pliers to loosen it.
- Hose Clamp Pliers: Hoses in washing machines are held in place with clamps, and those clamps can be hard to remove without the right tool. Hose clamp pliers make it easy to grip, remove, or reattach clamps without damaging the hose.
- Adjustable Wrench: You’ll often need to tighten or loosen nuts, bolts, or hose fittings. An adjustable wrench works with different sizes, so you don’t need multiple tools.
Safety Tools
When working on appliances, safety always comes first. These tools help protect you from injury:
- Work Gloves: Washing machines can have sharp edges, dirty parts, or grease. A sturdy pair of gloves keeps your hands safe and clean.
- Safety Goggles: Small screws, dust, or water can fly around when you’re working. Goggles protect your eyes from accidents and splashes.
Specialized Tools for Advanced Repairs
If you’re comfortable handling basic repairs and want to try more advanced fixes, these tools will help:
- Tub Nut Wrench: This tool removes the tub nut, which holds the washer drum in place. You’ll need it if you’re working on the drum or replacing parts inside it.
- Bearing Removal Tools: Bearings help the drum spin smoothly. If they’re worn out, your washer might make loud noises or vibrate. This tool makes it easier to remove and replace the bearings safely.
- Clamp Removal Tool: Some clamps are tough to remove, especially if they’re in awkward positions. A clamp removal tool grips and removes clamps without damaging nearby parts.
How to Build Your Washer Repair Toolkit
If you’re just starting out, you don’t need to buy every tool right away. Here’s how to build your toolkit step by step:
- Start with the Basics: First, buy a screwdriver set, needle-nose pliers, an adjustable wrench, and a flashlight. These tools will handle most simple washer problems.
- Invest in Quality Tools: Cheap tools can break or cause damage to your washer. Spend a little more on good-quality tools that will last a long time.
- Add Specialized Tools Later: Once you’ve mastered basic repairs, add tools like a tub nut wrench or bearing removal kit for bigger jobs.
- Stay Organized: Use a toolbox or bag to keep your tools organized and easily found. Label your tools if needed.
Safety Precautions Before Starting Repairs
Before you start fixing your washer, always follow these safety tips:
- Unplug the Washer: Always disconnect the power to avoid electric shock.
- Turn Off the Water: Shut off the water valves to stop leaks or spills while working.
- Test for Electricity: Use a multimeter to ensure no power flows to the machine.
- Wear Gloves and Goggles: Protect your hands and eyes from sharp parts, dust, and water.
These safety steps will let you focus on the repair without worrying about accidents.
Common Washer Problems You Can Fix
With the tools listed above, you can solve many common washer problems. Here are a few examples:
Washer Not Draining
- Tools Needed: Screwdriver, needle-nose pliers.
- Fix: Remove the panel, find the drain pump and hoses, and check for clogs. Clear any debris or replace damaged parts.
Washer Not Spinning
- Tools Needed: Multimeter, adjustable wrench.
- Fix: Use a multimeter to test the lid switch. If the switch doesn’t have continuity, it’s broken and needs to be replaced.
Leaking Washer
- Tools Needed: Adjustable wrench, hose clamp pliers.
- Fix: Check the hoses and clamps for cracks, loose connections, or leaks. Tighten clamps or replace broken hoses.
Troubleshooting Tips for Beginners
If this is your first time fixing a washer, keep these tips in mind:
- Start Simple: Before taking the washer apart, check for obvious problems like clogs or loose hoses.
- Look for Blockages: Hoses and drains are the most common places for clogs. Always inspect them first.
- Take Photos: When taking parts apart, take pictures to remember how to put them back together.
- Read the Manual: Your washer’s manual will have diagrams and troubleshooting steps specific to your model.
- Know When to Stop: If the repair seems too complicated, don’t be afraid to call a professional. It’s better to get help than make the problem worse.
Conclusion
Fixing your washing machine at home is completely doable with the right tools and knowledge. Start small with simple repairs, focus on safety, and build your toolkit over time. Not only will you save money, but you’ll also gain the confidence to take on more repairs in the future.
You can turn washing machine problems into easy fixes with the right tools and patience. Take it step by step, and you’ll be surprised at what you can accomplish!
Related service
Need a technician?
We handle appliance repair across Metro Vancouver and the Lower Mainland. Same-day service usually available.