Top Vacuum Attachments for Dryer Vent Cleaning
Essential Vacuum Attachments for Effective Dryer Vent Cleaning
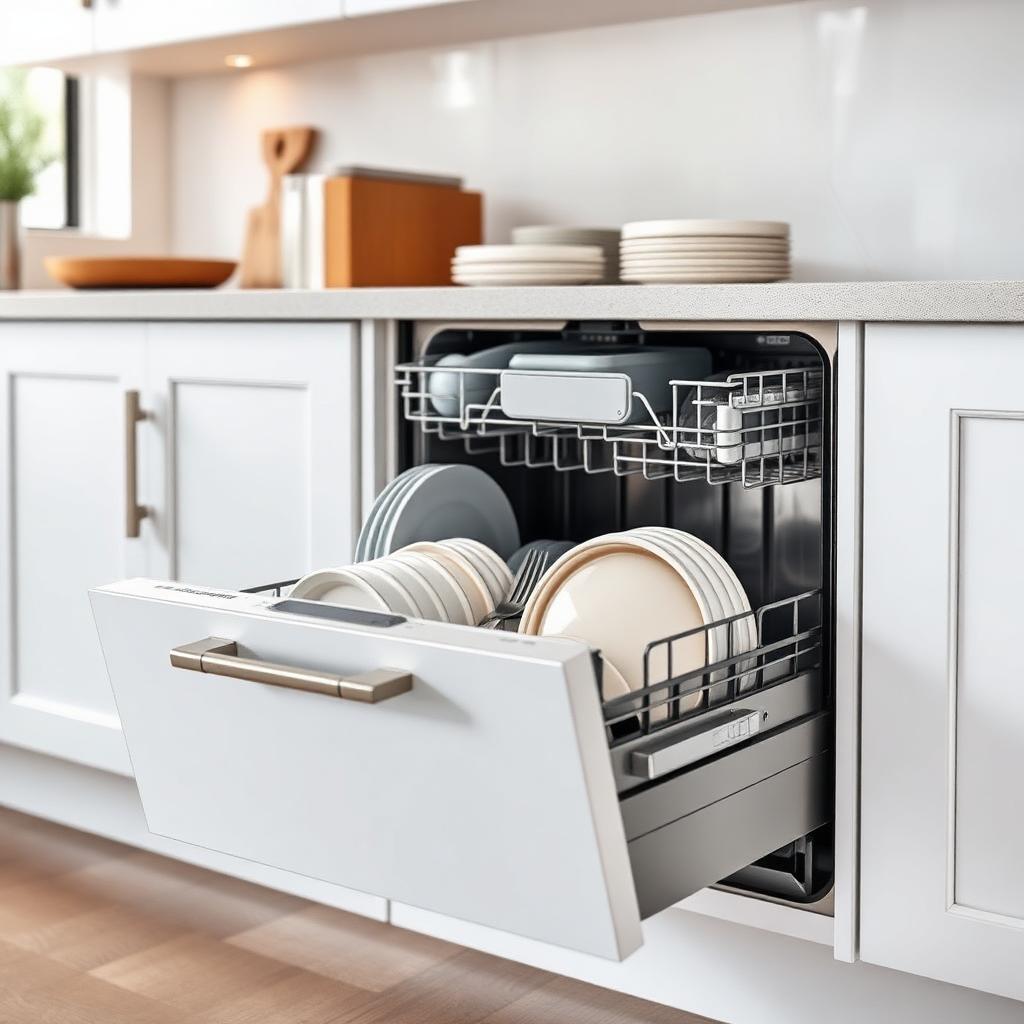
Keeping your dryer vent clean is essential for safety and efficiency. Over time, lint and debris can accumulate in the vent, leading to longer drying times, higher energy bills, and even potential fire hazards. Dryer vent maintenance is crucial to prevent these issues. One practical way to maintain your dryer vent is by using specialized vacuum attachments designed to effectively reach deep into the vent and remove buildup.
This guide will discuss some of the best vacuum attachments for dryer vent cleaning, what makes them effective, and what to consider when choosing one.
Why You Need a Vacuum Attachment for Dryer Vent Cleaning
Let’s cut to the chase: dryer vent cleaning isn’t optional if you want a safe, efficient home. A clogged vent is more than just an inconvenience. It’s a straight-up hazard. Lint buildup in your vent can easily escalate into a fire risk, a statistic nobody wants to be part of. But here’s the thing: cleaning your vent manually or with basic tools isn’t enough. You need a vacuum attachment to reach those deep, narrow, and often curved spaces where lint loves to hide.
These attachments aren’t just gimmicks; they’re engineered for the job. Unlike a standard vacuum head, which is too bulky for tight spaces, a dryer vent attachment can snake through your vent system, sucking out debris before it becomes a problem. It’s about getting into the trenches, places you’d never be able to reach with just your hands or a broomstick.
Features to Look for in a Vacuum Attachment
Not all tools are created equal when selecting a vacuum attachment for dryer vent cleaning. Finding one that suits your specific setup while delivering effective results is key. Below is a detailed breakdown of essential features that can make the difference between an average attachment and a great one:
Length
Length is critical for effective cleaning.
- Look for an attachment at least three feet long, although longer is better for homes with extended duct systems.
- Insufficient length means you’ll only clean the easily accessible sections, leaving hidden lint and debris untouched potentially risking fire hazards.
Flexibility
Not all dryer vents run in straight lines.
- Opt for a flexible hose that can navigate bends, twists, and awkward angles.
- Rigid attachments are less effective for tight spaces, so ensure the tool bends without pinching or breaking.
Ease of Use
A tool designed for convenience makes all the difference.
- Choose attachments that snap securely onto your vacuum and don’t require complex setups.
- Lightweight designs and intuitive assembly save time and effort, simplifying the task.
Material Durability
Durability ensures your attachment can handle repeated cleaning jobs.
- Look for attachments made from reinforced plastics or materials with metal-reinforced connectors.
- Avoid inexpensive, flimsy tools that may not withstand wear or friction in tight spaces.
Compatibility
Ensure the attachment works with your vacuum model.
- Double-check the connection size it should match your vacuum cleaner.
- Some attachments come with adapters for broader compatibility, but always confirm this to avoid unnecessary installation headaches.
Special Features
Some tools offer additional perks that enhance their performance. Consider:
- Bristle tips for loosening stubborn lint and debris.
- LED lights for better visibility inside dark ducts.
While not essential, these features can significantly improve the cleaning experience.
Top Vacuum Attachments for Dryer Vent Cleaning
Here’s a rundown of standout vacuum attachments that are especially effective for dryer vent cleaning:
Flexible Crevice Tool
The flexible crevice tool is a popular option for dryer vent cleaning. This long and slim attachment has a flexible design that allows it to bend into curved vent pipes. Features to look for:
- Slim design to fit tight spaces.
- Durable materials that withstand frequent use.
- Attachments for different vacuum models.
Dryer Lint Vacuum Attachment
This specific attachment is designed to target lint in your dryer and vent. It usually comes with a long, narrow tube and bristles at the end for loosening lint. Benefits include:
- Direct targeting of lint buildup, even in deep areas.
- Easy to attach and use.
- Affordable and widely compatible.
Brush Vacuum Attachment
A brush vacuum attachment combines a vacuum’s suction power with a brush’s scrubbing action. Ideal for removing stubborn debris in the vent. Look for:
- Stiff bristles for effective cleaning.
- Different brush sizes for various vent diameters.
- Durable construction for long-term use.
Hose Extension Kits
Hose extension kits often come with additional tools for versatility. These kits are ideal for users with long, hard-to-reach vents. Key features:
- Long hoses are used to clean the vent at the full length.
- Multiple nozzle options for different cleaning needs.
- Compatibility with most standard household vacuums.
Specialized Dryer Vent Cleaning Kits
These kits often include a combination of tools such as flexible hoses, crevice nozzles, and brushes. They are designed for dryer vent cleaning and can offer the most comprehensive solution. Features to expect:
- Full set of tools for a thorough cleaning.
- Flexible and extendable hoses.
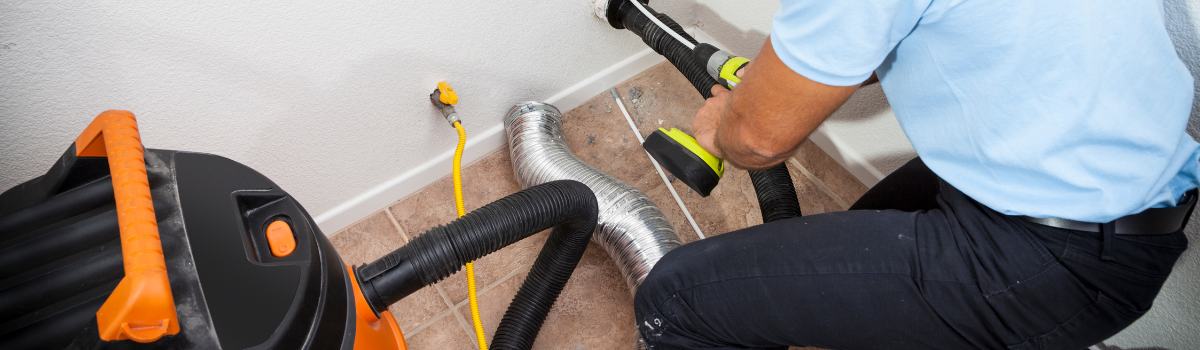
How to Use a Vacuum Attachment for Dryer Vent Cleaning
Cleaning your dryer vent with a vacuum attachment isn’t complicated, but doing it effectively requires attention to detail. Follow these steps to ensure a safe and thorough job.
Start with Safety
- Turn Off the Dryer: Unplug the dryer to ensure it’s completely powered down.
- For Gas Dryers: Shut off the gas supply for added safety before beginning.
Access the Vent
- Move the dryer carefully away from the wall to create a working space.
- Locate the vent attachment on the back of the dryer and disconnect the vent hose.
Tip: You may need to loosen a clamp or screws depending on your setup.
Deploy the Vacuum Attachment
- Attach the right vacuum tool to your vacuum cleaner:
- A long, flexible crevice tool works well.
- A specialized dryer lint attachment is ideal for deeper cleaning.
- Insert the attachment into the vent hose and gradually work it deeper into the duct.
Pro Tip: Take your time slow and steady, ensuring thorough cleaning.
Vacuum Inside and Outside the Vent
- Inside the Vent: Clean as far as the attachment will reach.
- External Vent: Focus on the external vent (the one venting air outside your home).
Use the same attachment to remove lint and debris stuck in this area.
Inspect Your Progress
- Use a flashlight to check for any leftover lint or blockages in the vent.
- For Stubborn Buildups, Consider switching to a brush attachment for tougher debris.
Reassemble the Vent
- Reconnect the vent hose to the dryer, ensuring it’s securely fastened with no gaps.
- Push the dryer back into place, ensuring the vent hose isn’t kinked or pinched.
Test the System
- Plug the dryer back in. If it’s a gas dryer, turn the gas supply back on.
- Run a short drying cycle to confirm that air flows freely through the vent.
Benefits of Regular Vent Cleaning
Taking 15 minutes to clean your dryer vent regularly has big benefits:
- Improved air quality.
- Reduced risk of dryer fires.
- Increased dryer efficiency.
- The satisfaction of a safe, well-maintained home.
With the right tools and process, this once-dreaded chore can become a simple part of your home maintenance routine!
Tips for Choosing the Right Attachment
Regarding vacuum attachments for dryer vent cleaning, the right choice can save you time and effort and possibly a costly repair. Here are a few things to keep in mind that will help you select the most suitable tool for the task:
- Consider the vent length: Measure the length of your dryer vent before purchasing any attachments. If your vent is unusually long or extends far outside your home, opt for attachments with extended reach or hose kits designed for such distances. A standard crevice tool won’t cut it for a twelve-foot vent.
- Account for bends and curves: Few dryer vent setups are perfectly straight. Choose a flexible attachment to maneuver around corners without losing suction or getting stuck. Stiff tools might seem sturdy, but they’re often useless in a vent with multiple turns.
- Check online reviews: There’s no shortage of options, and not every attachment delivers on its promises. Look for detailed customer reviews about performance and fit. This can help you avoid buying something that’ll snap in two on the first use or fail to connect securely to your vacuum.
- Go for multi-purpose tools: Attachments that serve dual purposes like cleaning refrigerator coils, HVAC ducts, or under furniture offer more bang for your buck. A kit with several interchangeable pieces is often a practical investment.
- Prioritize quality: Cheaper materials might save you a few dollars upfront, but a poorly constructed attachment can crack, strip, or weaken quickly. Spending more on a durable, well-made tool ensures it’ll last through multiple cleaning sessions without needing a replacement.
Making an informed decision now can save a lot of frustration later plus, it’s far easier to clean a vent once when you have the right attachment handy than to wrestle with tools that don’t fit the job.
When to Replace a Vacuum Attachment
Even the best vacuum attachments have a limited lifespan. Regular usage, especially for heavy-duty tasks like dryer vent cleaning, can wear down these tools over time. Failing to replace deteriorated attachments may reduce cleaning effectiveness or damage your dryer vent or vacuum. Below are clear signs to help you determine when to replace your vacuum attachment.
Key Signs Your Attachment Needs Replacement
Visible Damage
- Cracks, splits, or frayed edges on hoses or tools indicate that the attachment is no longer functioning properly.
- These can cause air leaks and reduce suction power, making cleaning less effective.
Loss of Functionality
- Detachment issues disrupt cleaning tasks, such as attachments that no longer fit snugly or fall off frequently.
- A secure fit is crucial for efficient vacuuming.
Declining Suction Power
- Warping or leaks in the attachment may compromise suction power.
- If lint or debris is being left behind that previously wouldn’t have been, your attachment could be to blame.
Degraded Bristles or Brushes
- Attachments with built-in brushes often wear down over time. Frayed or flattened bristles fail to loosen debris or scrub surfaces effectively.
Frequent Jamming
- If lint or small debris constantly clogs the attachment despite regular maintenance, this might indicate internal wear or an unsuitable design for your specific cleaning task.
Why Timely Replacement Matters
Procrastinating on replacing a worn-out vacuum attachment can impact your cleaning efficiency and even risk equipment damage. Upgrading to a new attachment ensures that:
- Your vacuum operates at peak performance.
- Your cleaning tasks, like dryer vent maintenance, are completed effectively and effortlessly.
If you notice any of the above signs, replace your vacuum attachment and keep your cleaning tools in optimal condition.
Conclusion
Keeping your dryer vent clean is more than just a chore it’s essential to safeguarding your home and reducing energy costs. Here’s a quick summary of key points to consider for effective dryer vent maintenance:
Benefits of Cleaning Your Dryer Vent
- Improved Safety: Minimize the risk of dryer fires caused by lint buildup.
- Energy Efficiency: Lower your energy bills by ensuring your dryer operates at peak performance.
- Extended Appliance Lifespan: Reduce wear and tear on your dryer, saving money on repairs or replacement.
Tools to Simplify the Process
- Flexible Crevice Tool: Perfect for navigating tight spaces within the vent.
- Dryer Vent Cleaning Kit: A comprehensive option for deep cleaning, even in hard-to-reach areas.
Using the right vacuum attachment or cleaning tools, you can tackle this task like a pro without needing costly professional services.
Final Tips
- Make it a habit to clean your dryer vent regularly.
- Invest in high-quality tools for a stress-free cleaning process.
- Enjoy the benefits of a safer, more efficient home year-round.
Cleaning your dryer vent doesn’t have to be intimidating or time-consuming. Invest once, clean often, and protect your home while saving money!
Related service
Need a technician?
We handle appliance repair across Metro Vancouver and the Lower Mainland. Same-day service usually available.